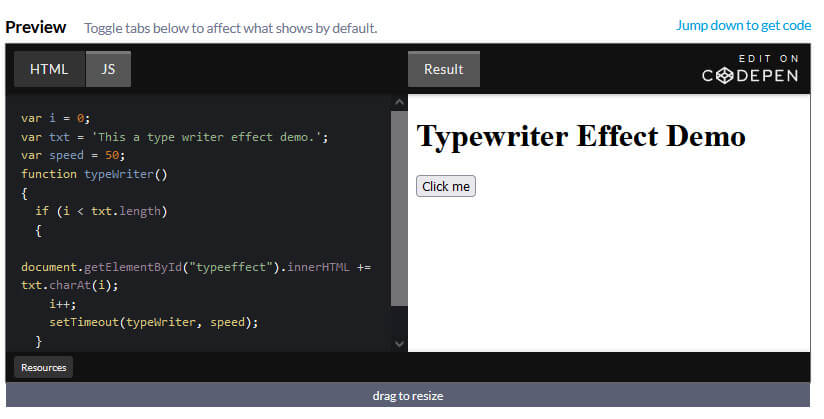
How to add Typing Effect / Type Writer Effect to your text Using JavaScript
By Richard
/ June 5, 2022
How to add Typing Effect / Type Writer Effect to your text Using JavaScript Step 1) Add HTML: <h1>Typewriter</h1>...
Read More24/7 telephonic support : +91-9811885502, +91-9811885503
One of the many reasons for a successful business is good relations between customers/users and the company. Companies listen to the feedback provided by the customer/user and take action accordingly. You can see forms on the contact/contact us page on almost every website, which asks for name, email, phone number, and message, etc.
To validate users you can also see the registration page. The next time you visit the page you have to log in and if you happen to forget the password then there is also forgot password page to help you.
These are where HTML form comes in which is the most important element in any kind of data collection and then sends it to a server for further processing. This form can be the Registration Form, Log In Form, Admission Form, Subscription Form, Search Form, Feedback Form any kind of information input filled by the customer/user.
An HTML form is a section of a document containing normal content, markup, special elements called controls (checkboxes, radio buttons, menus, etc.), and labels on those controls. Users generally “complete” a form by modifying its controls (entering text, selecting menu items, etc.), before submitting the form to an agent for processing (e.g., to a Web server, to a mail server, etc.)
Form Attributes
| Attribute | Description |
| accept | Comma-separated content types the server accepts |
| accept-charset | List of character encodings that the server accepts |
| action | Specifies the encoding of the submitted data |
| autocomplete | Indicates whether input elements can by default have their values automatically completed by the browser |
| enctype | The mime type used to encode the content of the form |
| method | Specify the method to be used to upload data |
| name | Unique name for the form |
| novalidate | The boolean attribute indicates that the form shouldn’t be validated when submitted |
| rel | Creates a hyperlink or annotation depending on the value |
| target | Indicates the target of the address in the action attribute |
HTML Form Controls
There are different types of form controls that you can use to collect data using HTML form:
Text Input Controls
There are three types of text input used on forms:
Example


Following is the list of attributes
Example

Output

Following is the list of attributes
Example

Output

Following is the list of attributes
Checkboxes Controls
The checkboxes are input controls that are used to select a single option from the list of options. The <input> tag with the value of the type attribute as “checkbox” is used to create checkboxes. This input control also supports name, value, and checked as optional attributes.
Example


Following is the list of attributes
Radio Buttons Controls
The radio buttons are input controls that are used to select multiple options from the list of options. The <input> tag with the value of the type attribute as “radio” is used to create radio buttons. This input control also supports name, value, and checked as optional attributes.
Example

Output

Following is the list of attributes
Select Box Controls
The select box or dropdown box is input controls that are used to select one or more options from the huge list of options. The <select> tag is used to create select box. This tag supports name as an attribute. The option to be selected is listed with <option> tag having value as the attribute. This <option> tag also has selected as an optional attribute.
Example

Output

Following is the list of attributes
File Select Boxes
If you want to allow a user to upload a file to your web site, you will need to use a file select box. This is created using the <input> element but type attribute is set to file.
Example

Output

Following is the list of attributes
image/*: To upload all types of images.
audio/*: To upload all types of audio.
video/*: To upload all types of video.
file_extension: To upload specific files.
Hidden Controls
Hidden controls are used to hide data inside the page which later on can be pushed to the server. This control hides inside the code and does not appear on the actual page.
Example

Output

Following is the list of attributes
Buttons Controls
The buttons controls are created using <input> tag or <button> tag.
The <input> tag with the value of the type attribute as “submit”, “reset” or “button” is used to create a Submit Button, Reset Button, or other Buttons respectively. Apart from the name as the attribute, value attribute is also used, which displays text on the button.
Example

Output